
Pipe Insulation
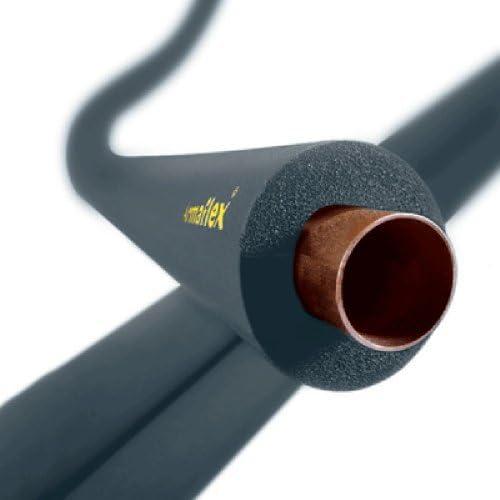
ArmaFlex Class O Foam Pipe Insulation 13mm x 6mm x 2m
ArmaFlex Class O foam pipe insulation with a 13mm wall, sized for 6mm diameter pipework. Supplied as a 2 metre unsplit tube for clean, continuous installation.
£6.98
Guide
The short answer
Insulation labelled 13 x 6 x 2m does not fit a 13mm pipe. What each number on pipe insulation and lagging means, and which one to measure first.
Pipe insulation, or pipe lagging as it is just as often called, is sold with three numbers on it, and the first one is the one people get wrong. A tube described as 13 x 6 x 2m does not fit a 13mm pipe. It fits a 6mm pipe.
This catches people out often enough that it is worth setting down properly, because ordering on the wrong number means a tube that either will not go on or slides about once it is there.
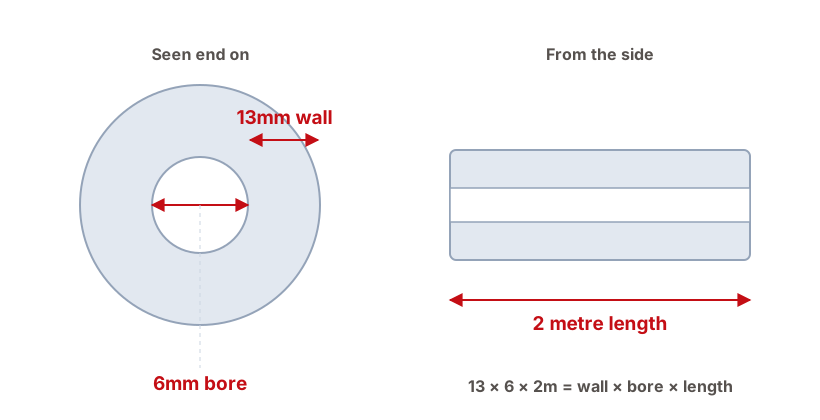
The first number is the wall thickness. It is how thick the insulating foam itself is, measured from the pipe outwards. On a 13 x 6 x 2m tube, that is 13mm of foam.
The second number is the pipe diameter it fits. This is the size of the pipe the tube is bored for. On the same tube, that is 6mm.
The third number is the length of the tube. Two metres, in this case.
So a 13 x 6 x 2m tube is thirteen millimetres of foam, bored for six millimetre pipe, supplied two metres long.
The pipe diameter is the number that decides whether the insulation fits at all, so it is the one to establish before anything else. Wall thickness affects how well the pipe is insulated. Pipe diameter affects whether you can fit it.
Once you know the pipe size, the wall thickness is a separate decision. A thicker wall means more insulation. What thickness is appropriate depends on the installation, where the pipe runs and what it carries.
If a specification, a building requirement or an installer has told you a thickness, use that. Where a specific thickness has been called for, it has been called for on grounds this page cannot see.
An unsplit tube is a continuous piece with no seam along its length. It gives a clean run, and it is fitted by sliding it onto the pipe, so it suits new pipework or a run with a free end to work from.
A pre-split tube is already cut along its length so it can be opened and closed around a pipe that is already installed.
Neither is better in general. What decides it is access. If you cannot reach a free end of the pipe, an unsplit tube will be difficult to fit.
The order never changes: wall first, pipe second, length third. That is the rule to rely on, because guessing from the sizes themselves does not work.
On very small bore pipework the pipe is the smaller figure, which is why 13 x 6 reads oddly until you know the order. On everything larger it is usually the other way round. A 13 x 15 x 2m tube is 13mm of foam bored for 15mm copper, and a 25 x 40 x 2m tube is 25mm of foam bored for 40mm pipe.
When in doubt, measure the pipe and match the second number to it.